

How to Take Photos of Clothes to Sell [3 Methods]
Have you ever found yourself scrolling through an online marketplace, only to stumble upon poorly photographed clothes that almost cause you to be alienated from the whole idea of shopping? Trust me, we've all been there. Whether you're a seasoned online seller or just starting, one thing is clear: Great product photography is the most crucial factor when it comes to selling clothes online.
Product information and photographs play a significant role in influencing how consumers buy clothes online. A study conducted with 651 young consumers in Turkey revealed that factors like size, fabric content, color, waist size, slackness, and suitability for different body types greatly impact their purchasing decisions. Focusing on clear and visually appealing images that accurately represent the pants' color, fit, and fabric texture is crucial, as highlighted by this study, in order to effectively capture potential customers' attention and provide them with an engaging and informative online shopping experience.
In today's blog post, we're going to dive into the art of capturing stunning pictures of clothes to help you boost your sales and attract more customers. Also, we will explore two alternative methods that most of the time are not preferred by the brands, but that you can take your photo shoots faster and more precisely. Get ready to learn how to take pictures of clothes to sell and take your online selling game to new heights!
Here's what we'll cover in this post:
- Clothing Photography Equipment
- Steps to Take Photos of Clothes to Sell
- Different Stylings of Clothes Photography
- Other Photography Options We Recommend
1. Clothing Photography Equipment
Before we jump into the techniques, let's talk about the equipment you'll need to capture those picture-perfect shots. Don't worry; you don't need to break the bank to get started. We'll give you a sneak peek at the essentials and some optional gear that can take your clothing photography to the next level, and later we'll get into details.
Here's a rundown of what you'll need:
1.1. Camera
When it comes to choosing a camera to capture high-quality pictures of their clothes, DSLR cameras offer excellent image quality, interchangeable lenses, and manual controls, making them a popular choice.
Mirrorless cameras are also compact, feature-rich, and provide superb image quality with advanced autofocus capabilities.
If you're not keen on immediately investing in a professional camera, there's no need to fret! You can still snap top-notch photos using a high-end smartphone that can function as a professional camera. It's a wallet-friendly alternative that enables you to achieve exceptional outcomes without straining your finances. So, whether you're just starting out or on a tight budget, your trusty smartphone can step up to the task and deliver impressive photographic capabilities.
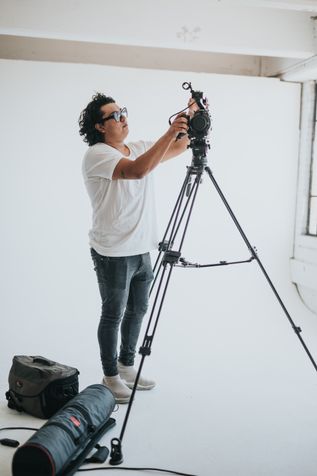
1.2. Tripod
A sturdy tripod is your best friend when it comes to keeping your camera steady and avoiding blurry photos. It's especially handy if you're shooting in low light conditions or want to experiment with longer exposures. It will help you maintain consistency in framing and composition as well. Therefore, it's evident that tripods are a must in product photography.
1.3. Lighting Source
Proper lighting is key to ensuring that the colors of your clothes appear accurate and vibrant. Natural lighting is the best option, so try to set up your shoot near a large window or in an outdoor location. However, if you're shooting in a darker space or at night, consider investing in a softbox or a ring light to ensure consistent and flattering illumination.
1.4. Foam Boards
Foam boards are great for manipulating lighting and creating even illumination on your clothing items by reflecting light and reducing shadows. You can use them as reflectors to bounce light onto shadows or as diffusers to soften harsh light onto your clothes, creating a more even and professional-looking result.
1.5. Backdrop
Choose a clean and neutral backdrop to make your clothes stand out. A plain white or light-colored wall works great, but you can also use fabric or paper backdrops for added variety and style. These backdrops will help you keep the focus on the clothing items.
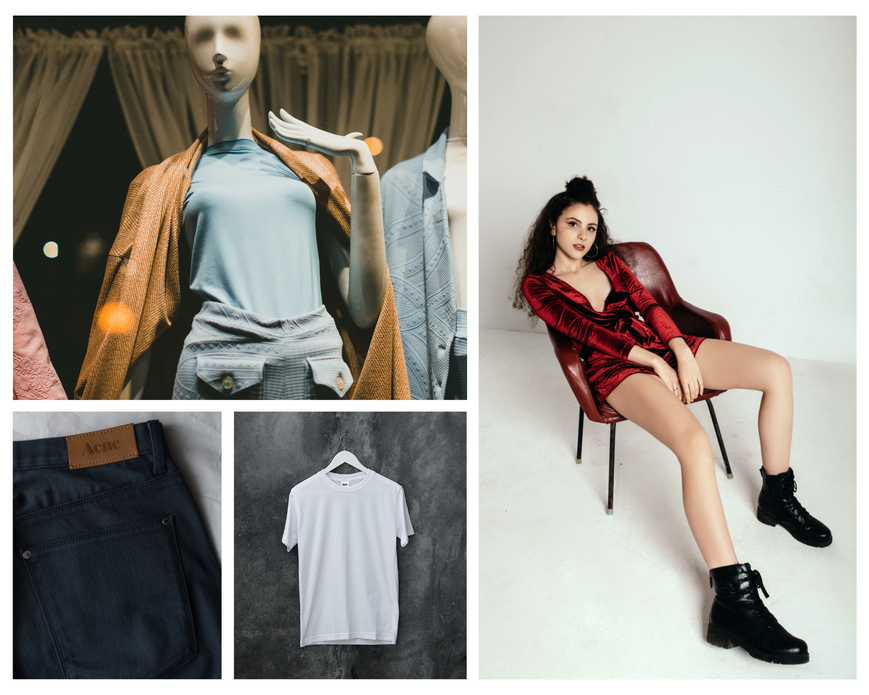
1.6. Model or Mannequin or Hanger
Depending on the concept you want to shoot the products, you'll need something to display your clothes. A live model can bring your garments to life and provide a sense of how they fit and look when worn. This helps create emotional connections and makes it easier for customers to envision themselves wearing the clothes. Models also highlight the details and features of the garments, enhance professionalism, and contribute to building your brand identity.
If that's not feasible, a mannequin or a clothing hanger can still do the trick, allowing you to focus on the details of your clothes. Each option has advantages, so choose the one that best suits your brand and the clothing style you're selling.
However, we still recommend you go with a real-life model if you have enough resources.
2. Steps to Take Photos of Clothes to Sell
To achieve eye-catching product images, let's walk through the steps involved in the process:
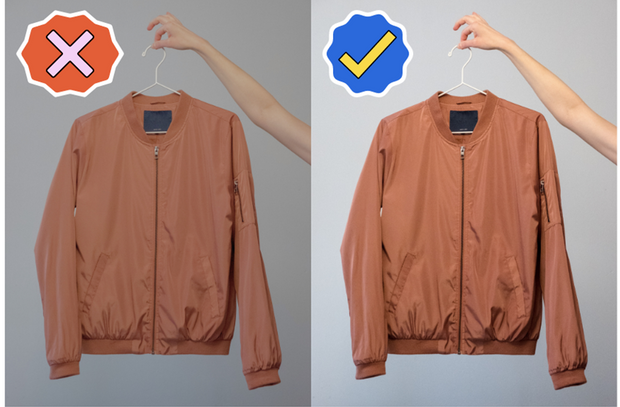
2.1. Get Your Clothing Products Ready for the Photoshoot
Before diving into the photography process, ensure that your clothing products are in top-notch condition. Take the time to ensure they look their absolute best. This step is crucial as it will significantly impact the overall presentation of your clothes in the photos.
While it's true that you can edit the products using Photoshop after taking the photos, it's important to consider that this approach adds more work and comes with its own set of risks.
Here are the things to watch out for while preparing your clothes:
- Ensure the clothes are clean and free from visible stains, wrinkles, or lint
- Iron or steam the clothes to remove any wrinkles or creases
- Pay attention to details like loose threads or missing buttons and fix them beforehand
- Arrange the clothes neatly, either folded or hung, for photography
- Consider accessories or styling elements that enhance the clothes without overshadowing them
- Check for visible branding or labels on the clothes that should be showcased in the photos
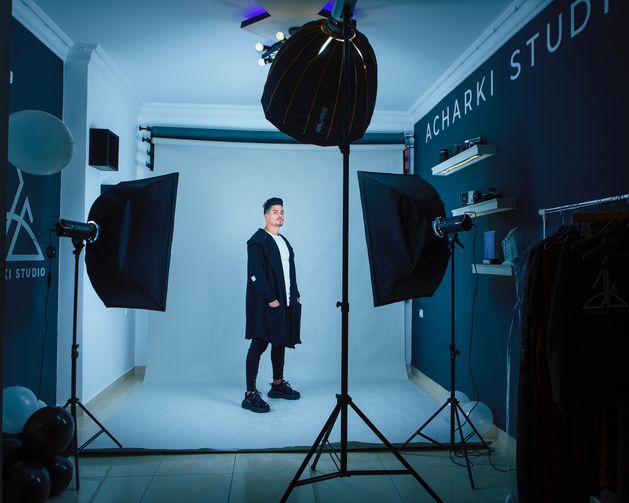
2.2. Prepare your Photography Studio
When it comes to capturing stunning product photos for your online store, preparing the right environment can make a world of difference. You don't necessarily need a fancy professional studio—by utilizing a well-lit area in your home, you can easily transform it into your very own photography studio. Not only will this save you money, but it will also increase the overall quality of your photos.
a. Arrange Your Backdrop
To arrange the backdrop for your clothing photoshoot, start by
- Choosing a clean and uncluttered area in your home or studio.
- Use a neutral-colored backdrop, such as white or gray, to provide a clean and timeless look.
- Decide whether to hang the clothes or use a flat-lay setup.
- Ensure the backdrop is smooth and wrinkle-free.
- Position the clothes at an appropriate distance from the backdrop to avoid shadows.
- Experiment with different depths and angles for visual interest.
- Take test shots and adjust as needed to achieve a clean and professional backdrop that highlights your clothing effectively.
b. Prepare the Lighting
When it comes to taking photos of your clothes for your online store, lighting is super important! It can make a world of difference in how your products look and how attractive they appear to potential customers. Bad lighting can make your products lose all their charm.
First up, look for a spot in your home/store with good natural light, like near a big window or in a well-lit room. But, if natural light isn't readily available or consistent, don't worry. You can still achieve great lighting with the artificial sources we talked about above. They can help you mimic the effect of natural light and give your clothes that professional glow.
Still not sure how to take pictures of clothes to sell online? With the three-point lighting setup, you can easily create a well-balanced and visually appealing look. It involves three main light sources positioned strategically around the subject to control the lighting and shadows.
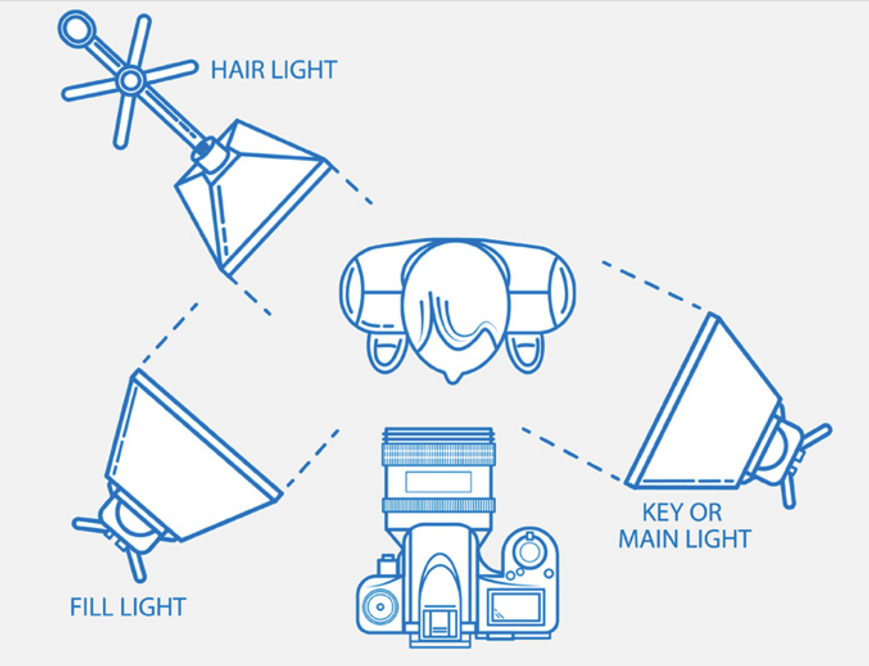
Here's a guide on how to set up basic three-point studio lighting:
- Key Light: It is the main light source and serves as the primary illumination for your subject. It is typically the brightest light and is positioned at a 45-degree angle to the subject, slightly off to one side. This light helps define the shape and details of the subject.
- Fill Light: It is used to soften the shadows created by the key light. It is placed on the opposite side of the key light, also at a 45-degree angle to the subject. The intensity of the fill light is typically lower than the key light, ensuring that it fills in the shadows without overpowering the key light. This helps create a more balanced and flattering lighting setup.
- Hair light: It is positioned behind the subject and aimed towards them from a higher angle. It helps separate the subject from the background by creating a subtle halo or rim of light around the edges. This light adds depth and dimension to the image, making the subject stand out.
c. Position Your Camera
1. The Importance of Visuals in Online Shopping:
When customers browse your online store, they rely heavily on visuals to evaluate the clothing items. By positioning your camera effectively, you can ensure that the clothes are presented in a visually pleasing and informative way. This, in turn, increases their confidence in making a purchase.
2. Using a Tripod for Stability:
First off, using a tripod is a must as we have mentioned before. It provides stability and ensures that your camera stays in the same position throughout your photoshoot.
3. Framing the Clothing Item:
When positioning your camera, make sure you capture the full garment within the frame. You want customers to see the entire design, length, and fit of the clothing item. This helps them visualize how it might look to them and makes the decision-making process easier.
4. Choosing the Right Angle:
Choosing the right angle is also important. A straight-on, front-facing angle is a popular choice as it gives a clear and direct view of the product. However, don't be afraid to experiment with slightly angled shots or different perspectives to add variety and visual interest to your product images.
5. Simulating Eye-Level Perspective:
Consider positioning the camera at an eye-level perspective. This simulates how a person would view the clothes when wearing them, making it easier for customers to imagine themselves in the garments. It creates a more relatable and engaging experience, which can increase their connection to the product.
6. Filling the Frame and Avoiding Distractions:
To make your clothing item stand out, make sure it fills a significant portion of the frame. Avoid excessive empty space or distracting backgrounds that might take away attention from the product itself. You want customers to focus on the details and textures of the garment.
7. Including Close-Ups and Multiple Angles:
To capture the full shots, don't forget to include close-ups and shots from different angles. Close-ups allow customers to see specific details like fabric patterns, buttons, or stitching, which can help them assess the quality and craftsmanship of the garment. Multiple angles give a comprehensive view, providing customers with a better understanding of the product. However, while doing close-ups, don’t zoom in on the phone but move the tripod. Otherwise, you will reduce the quality of your photos greatly.
It's actually pretty simple when it comes to how to take pictures of clothes to sell with an iPhone. Just follow the same steps above and make some adjustments to your phone’s camera settings. For suggestions about these settings, you can watch Shopify’s video about the issue.
d. Take the Photo
Now it's time to put your photography skills to the test. Place your clothing products on a mannequin, hanger, or model, depending on the style you want to convey. Experiment with different poses, folds, and arrangements to highlight the unique features and details of each garment. Don't be afraid to take multiple shots from various angles to capture the perfect image that truly represents your clothing.
After taking the photos, you may want to edit and enhance them using photo editing software to adjust the brightness, contrast, and other elements to ensure your images are visually appealing and well-balanced. For your product photos, photo editing software like Adobe Photoshop or Lightroom will be enough, and they are easier to use than you think!
3. Different Stylings of Clothes Photography
Now that you know how to prepare your very own photography studio, it's time to decide what styling you're going to use for your photo shoot. As mentioned earlier, when it comes to taking pictures of clothes, there are various styling options that you can choose from to best highlight the features and essence of your clothing items. You can experiment with different styles for each product or even combine them to create a unique look. If you're curious to discover the most fitting styles for your needs, let's take a look at four popular stylings for clothes photography:
3.1. Model
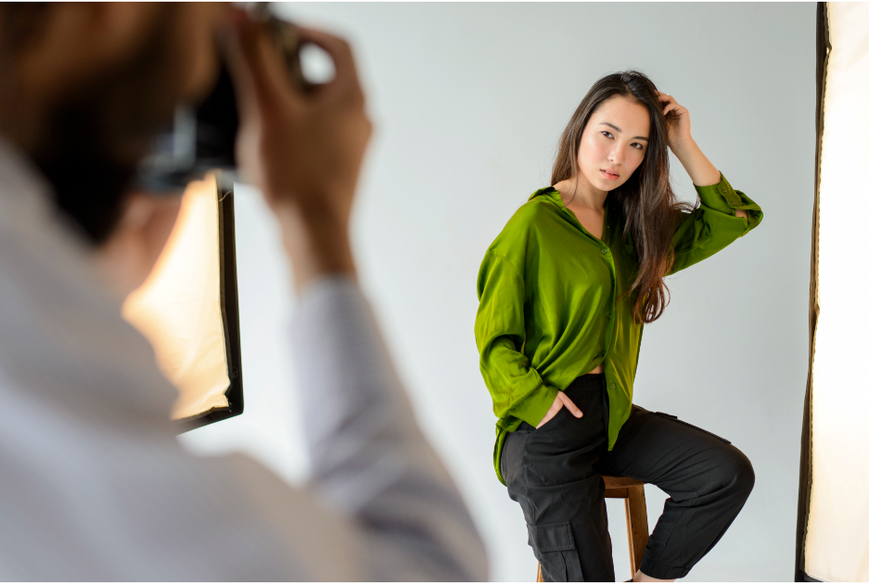
One of the most common and effective ways to showcase your clothes is by photographing them on a model. This styling brings life to the garments, as it allows potential buyers to visualize how the clothes might look on themselves. Using a model can help showcase the fit, style, and overall look of the clothing item, providing a better understanding to potential customers.
Advantages:
- Helps demonstrate the fit and styling
- Enhanced visual appeal
- Improved customer engagement
- Building brand identity
Disadvantages:
- Costly
- Time-consuming process
- Limited flexibility
- Potential inconsistency
3.2. Mannequin
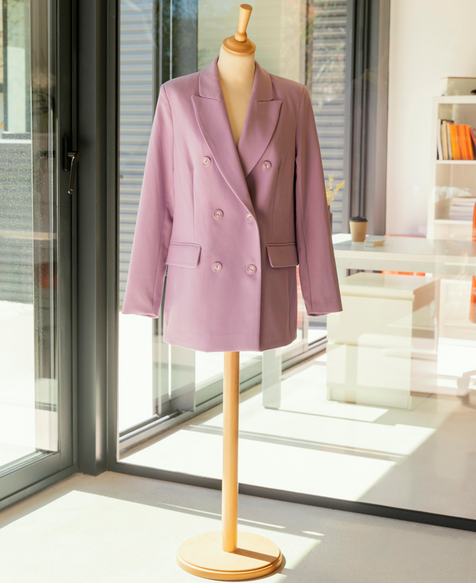
Photographing clothes on mannequins is another popular approach. This styling option allows for a more focused presentation of the clothing item itself, without the distraction of a model. By using a mannequin, you can emphasize the details, shape, and texture of the clothes, giving customers a clear view of what the garment looks like when worn.
Advantages:
- Cost-effective
- Consistency
- Convenient and time-efficient
- Focus on the clothing details
Disadvantages:
- Lack of human element
- Limited ability to showcase fit
- Potential for a less engaging customer experience
- Difficulty in conveying styling options
3.3. Flat-Lay
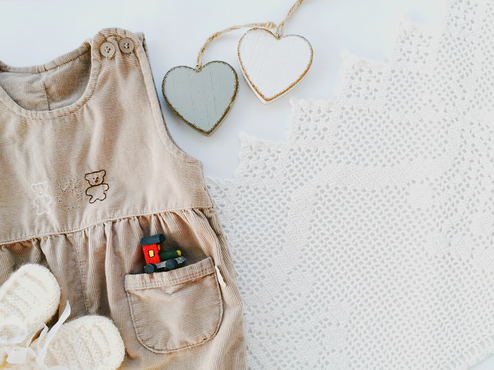
You’re now probably thinking about how to take pictures of clothes to sell without a mannequin or a model. You can use a flat-lay arrangement which is a more artistic or creative approach. Flat-lay photography involves laying clothes flat on a surface and arranging them in an aesthetically pleasing manner. This styling is particularly useful for capturing smaller items, and accessories, or displaying an entire outfit together. Flat-lay photography offers a unique perspective and allows for creative composition and arrangement of clothing items.
Advantages:
- Versatility
- Focus on clothing details and patterns
- Consistency
- Cost-effective
Disadvantages:
- Limited depiction of fit and drape
- Less visual representation of clothing when worn
- Potential for less customer engagement
- Challenging to showcase certain clothing types or styles
3.4. Hanger

Sometimes, less is more. If you prefer a no-nonsense approach, using hangers to display your clothes can be a great choice. This styling option keeps the focus solely on the garment itself. It's a straightforward and efficient way to capture the details of the clothing, such as draping, cut, and length, without any distractions.
Advantages:
- Simplicity
- Focus on the clothing design and shape
- Cost-effective
- Easy to manage and arrange
Disadvantages:
- Limited representation of fit and how the clothing drapes
- Lack of visual appeal compared to models or mannequins
- Potential for less customer engagement
- Difficulty in showcasing specific styling options
Lonca's Alternative Recommendations
So, we've covered the basics of how to take pictures of clothes to sell, whether you're doing it at home or in a suitable environment. While there are definitely advantages to capturing your product photos, let's face it: not everyone has access to professional equipment or the experience to achieve that polished look.
Sometimes, you find yourself in a bind where you need high-quality photos but lack the necessary resources or time to prepare them. But fret not! Here at Lonca, we've got you covered with some alternative solutions to tackle these situations head-on!
Agencies:
Working with a photography agency can be a game-changer when it comes to obtaining high-quality and professional product images. It's like having your very own dream team of photographers who handle everything for you. Say goodbye to the hassle of setting up your own equipment and struggling with DIY photography setups. With an agency, they take care of all your needs, ensuring a seamless and professional experience.
Photography agencies are equipped with high-resolution cameras, professional lighting setups, and specialized accessories, which results in images that truly pop. The agency's skilled photographers are experienced in capturing product images that highlight the best features of your clothes. Agencies often have designated photography studios or access to versatile spaces suitable for capturing product images. These spaces are designed with optimal lighting and backgrounds, allowing your clothes to take center stage without any distractions.
When requested, agencies can provide professional-grade mannequins to display your clothes. Once the photo shoot is complete, agencies typically offer editing and post-processing services to enhance the final images. Their skilled editors can fine-tune the lighting, colors, and overall aesthetics, resulting in polished and captivating visuals. By working with a photography agency, you're tapping into the knowledge and experience of a professional team, who can offer guidance and advice to ensure the best outcome for your brand.
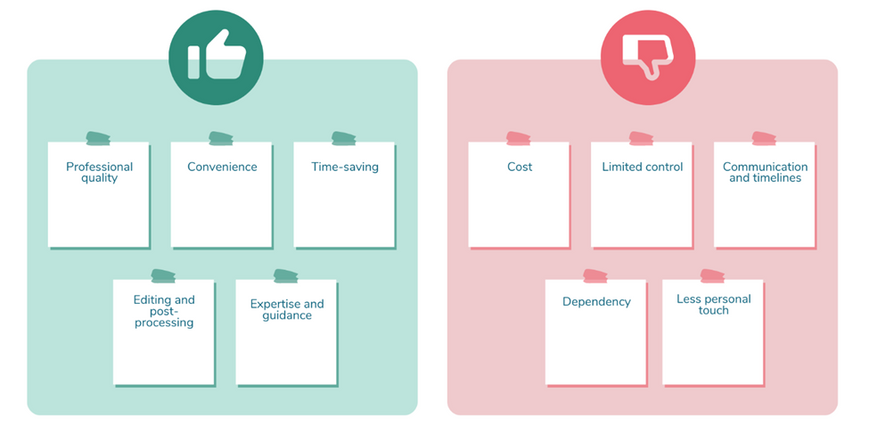
It's important to note that while choosing to work with a photography agency guarantees more professional photos than what you can achieve at home, it does come with a higher price tag. The services provided by agencies are comprehensive and require specialized skills and resources, making it a more expensive choice.
Here are some of the advantages and disadvantages of working with an agency for taking product photos:
When it comes to capturing product images for fashion products, two of the most preferred options are cut-out photography and model shooting. Both techniques have their unique advantages and cater to different needs. Luckily, photography agencies can assist you in achieving great results with either of these options.
Modelled:
Agencies specializing in fashion photography have access to professional models and can provide the necessary resources for model shooting. They can arrange the photo shoot, handle model casting, and ensure that the styling and posing perfectly complement the clothing. With their expertise in capturing dynamic shots and directing models, they can create captivating visuals that bring your fashion products to life.
Cut-out:
Cut-out photography involves capturing images of clothing products on a plain background, typically without any models wearing them. This technique allows the focus to be solely on the clothes themselves, showcasing their design, details, and fit.
Photography agencies can provide the necessary equipment and expertise to ensure clean and professional cut-out images. They have the tools to create a seamless background and utilize proper lighting techniques to enhance the clothing's appearance. With their editing and post-processing services, they can refine the images, adjust colors, and remove any distractions, resulting in polished product photos.
Average Prices:
Take a look at the table below to get an idea of the average costs and extra budgets for different types of visual shots for various products. It's a handy reference to help you plan your photography needs:
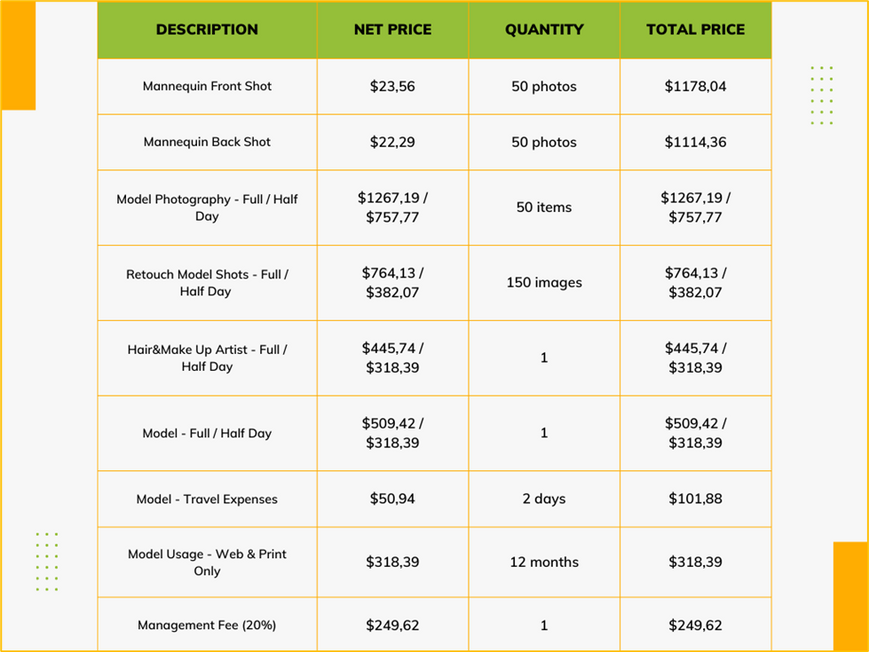
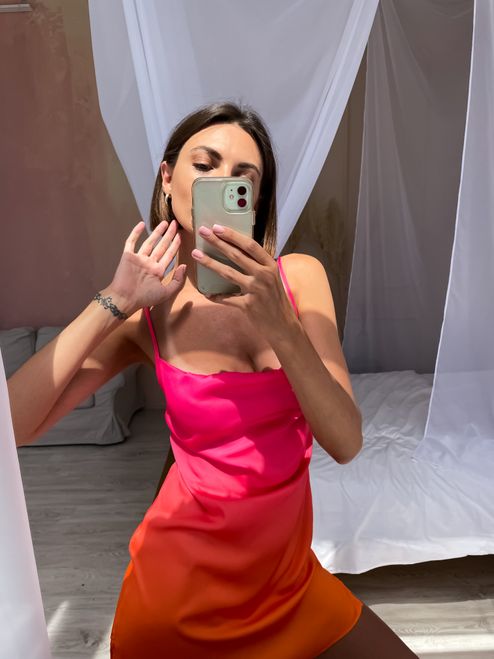
Photo Shoot with Contracted Model
The idea behind this alternative is simple yet effective. You collaborate with a model of your choice who will take pictures of herself wearing your clothes in her own home or a self-prepared environment. These images are taken in front of a mirror, resulting in a more casual and authentic vibe. It's important to note that while these photos may not have the level of professionalism you'd get from other options, they offer a more affordable and quicker method compared to shooting on your own or hiring an agency.
Pricing for this option is usually calculated per product, with the average cost ranging between $5-10 per item. Keep in mind that the quality of the images may vary, but with a little creativity and guidance, you can still achieve attractive visuals that entice potential customers.
Now, you might be wondering how to find these models who can bring your clothing to life through their own photo shoots. Here are a few tips to help you get started:
- Social Media: Look for profiles of aspiring models or influencers who align with your brand's aesthetic. Reach out to them, explain your collaboration idea, and negotiate the terms.
- Model Networking Websites: Explore websites specifically designed for connecting brands with models, such as ModelMayhem. These platforms allow you to search for models based on location, experience, and other relevant criteria.
- Local Modeling Agencies: Contact local modeling agencies and inquire about any models who might be interested in working on a freelance basis. Some models may be open to side projects and collaborations.
- Online Freelance Platforms: Browse freelance platforms like Upwork or Fiverr, where you can find individuals with modeling skills who offer their services for product photography.
Lonca's Advice: When reaching out to models, be clear about your expectations, provide examples of the style and aesthetic you're aiming for, and discuss pricing and delivery timelines. Building good communication and a positive working relationship with your contracted models is essential for successful collaboration.
Take Those Product Photos and Upload Them Today
Capturing compelling and attractive product images is crucial for successfully selling clothes online. In this blog post, we explored two alternative methods for taking pictures of clothes: using a model and using a mannequin/flat-lay/hanger. Each styling option offers its unique advantages and appeals to different audiences.
Photographing clothes on a model allows potential buyers to envision how the clothing might look on themselves, showcasing the fit, style, and overall look of the garment. On the other hand, photographing clothes on a mannequin can provide a focused presentation of the clothing item itself, emphasizing its details, shape, and texture.
These two alternatives provide different perspectives and cater to diverse customer preferences. The choice between using a model or a mannequin depends on factors such as brand identity, target audience, and the message you want to convey about your clothing items.
Remember, regardless of the styling option you choose, there are essential steps to follow for capturing high-quality images. Prepare your clothing and hanger, set up a suitable background, arrange the lighting, and position and frame the shot effectively. Use a quality camera or smartphone to capture clear and detailed photos.
By implementing these strategies and experimenting with different approaches, you can showcase your clothing items in the best possible light and entice potential buyers. Your attention to visual presentation through effective photography will contribute to the success of your online clothing business.
We hope this blog post has provided valuable insights and practical tips about how to take pictures of clothes to sell online. Best of luck with your clothing business endeavors!